Super-Quick Beer Bread

This recipe, from My Baking Addiction, was a quick and tasty addition to our lunch of potato soup on a cold and lazy Sunday afternoon. It more than lives up to its name, as it took all of 5 minutes to throw together. The flavor is changed based on the type of beer you use, so feel free to have some fun with what you have in your home bar, I used a Pumpkin Lager from Lake Front Brewery, but if all you’ve got is Miller Lite, that’s fine too.


Ingredients:

  • 3 cups Self-Rising Flour
  • 1/3 cup Sugar
  • 1 tsp Kosher Salt
  • 12 oz Beer
  • 2 Tbsp Butter, melted

Directions:

  1. Preheat the oven to 375.
  2. Butter an 8×4 inch loaf pan and set aside. In a large bowl, combine the flour, sugar, salt and beer; mix well. The mixture will be sticky.
  3. Pour into the loaf pan and bake for about 55 minutes.
  4. At the last three minutes of baking, remove from oven, brush the top of the loaf with the melted butter and return to oven for the final three minutes of baking.

Challah French Toast

This recipe from Ina Garten proves that not all French Toast is created equal. This is the type of scrumptious breakfast treat that I thought could only be had at a restaurant; so, imagine my surprise when I discovered that I could make it at home. Though, one should wonder why that surprises me when I’ve gone so far as to make past from scratch, but I digress. This recipe creates a fabulous French Toast that crisps on the outside while remaining light and fluffy on the inside. Make is next weekend for your family, my boys love it.


Ingredients:

French Toast:

  • 6 extra-large eggs
  • 1 ½ cups Half & Half or Milk
  • ½ tsp Cinnamon
  • ½ tsp Vanilla
  • 1 Tbsp Honey
  • ½ tsp Kosher Salt
  • 1 large loaf Challah or Brioche bread
  • Unsalted Butter
  • Vegetable Oil

To serve:

  • Pure maple syrup
  • Good raspberry preserves (optional)
  • Sifted confectioners’ sugar (optional)

Directions

  1. Preheat the oven to 250.
  2. In a large shallow bowl, whisk together the eggs, half-and-half, orange zest, vanilla, honey, and salt. Slice the challah in 3/4-inch thick slices. Soak as many slices in the egg mixture as possible for 5 minutes, turning once.
  3. Heat 1 tablespoon butter and 1 tablespoon oil in a very large sauté pan over medium heat. Add the soaked bread and cook for 2 to 3 minutes on each side, until nicely browned. Place the cooked French toast on a sheet pan and keep it warm in the oven. Fry the remaining soaked bread slices, adding butter and oil as needed, until it’s all cooked.
  4. Serve hot with maple syrup, raspberry preserves, and/or confectioners’ sugar.

Easy, Homemade Focaccia Bread

I found this recipe by Anne Burrell on a blog I follow called The Noble Pig. With Panera, the local grocery, and other stores charging over $3.50 a loaf, I was excited to see it.

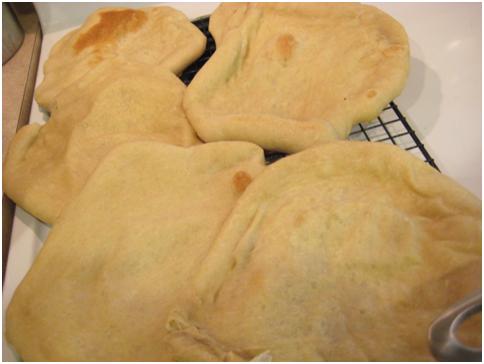
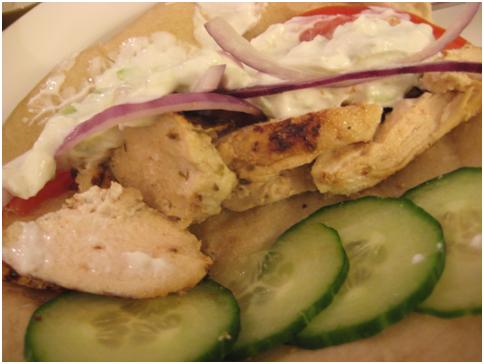
The fact that this is called “Easy” Homemade Focaccia Bread is a total understatement. This was downright simple. I even changed the preparation slightly to allow myself to bake two separate loaves of different “flavors” in 9″ cake pans, and it worked out great. I HIGHLY recommend making this the next time you are looking for a tasty bread to go along with just about anything. I think I’m going to use the leftovers for some lunchtime paninis.

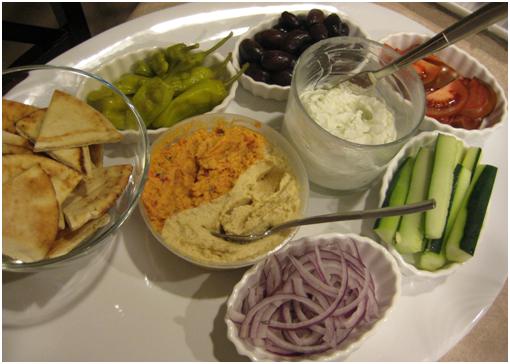
I have added notes for you to make the Sundried Tomato, Garlic, and Basil version I tried, but I think this bread lends itself to going along with a variety of add ins to suit your tastes. Fresh tomatoes, peppers, olives, different cheeses, herbs, onions, etc. There really isn’t a limit. My local grocery even makes a version with cheddar, jalapeño, and black olives that I may consider trying sometime.


Ingredients:

  • 1-3/4 cups warm water
  • 1 package active dry yeast
  • 1 Tablespoon sugar
  • 5 cups all purpose flour, plus additional for kneading
  • 1 Tablespoon kosher salt, plus more for sprinkling
  • 1 cup extra-virgin olive oil, divided
    • ¼ cup Sundried Tomatoes, roughly diced
    • 2 Cloves Garlic, finely chopped
    • ¼ cup Fresh Basil, roughly chopped or torn

Directions:

  • Combine the warm water (by warm I mean body temperature, you should be able to place your finger in the water and not get burned and it should not feel cold), yeast and sugar in a small bowl. Put the bowl in a warm (not hot or cool) place until the yeast is bubbling and aromatic, at least 15 minutes.
  • In the bowl of a mixer fitted with a dough hook, combine the flour, 1 Tablespoon of kosher salt, 1/2 cup olive oil and the yeast mixture on low speed. Once the dough has come together, continue to knead for 5-6 minutes on medium speed until it becomes smooth and soft. Give it a sprinkle of flour if the dough is really sticky and tacky.
  • Transfer the dough to a clean, lightly floured surface, then knead it a couple of times, sprinkling with flour. The dough is a “more tacky” kind of dough so rolling it around in some flour a few times until you can handle it is normal.
  • Coat the inside of the mixer bowl lightly with olive oil and return the dough to the bowl. Cover it with plastic wrap and put it in a warm place until the dough has doubled in size (as shown), 1 to 2 hours.
  • Coat a jelly roll pan (it must have sides), or two 9″ cake rounds, with the remaining 1/2 cup olive oil. Do not worry that this is an excessive amount of oil; focaccia is an oily crusted bread, which is why it is so good. The oil will be sucked up into the bread during baking, making it delicious.

    *A full batch of flavored bread can be made by mixing in your flavors while kneading your dough in step 2. If you’re looking to do a two variety mix in like I did here, follow these steps:

  1. After the first rise, step 4, separate the dough into two equal portions.
  2. Take one portion, and work into a disk and top as you would a pizza. Then roll it up in one direction, and then roll that roll from end to end.
  3. Move on to step 6 and proceed as you would normally. This will work in the flavors without over working the dough. You could also sprinkle some of those items on top of the loaf before baking as decoration, and indication of the flavors within.


  • Put the dough onto the jelly roll pan and begin pressing it out to fit the size of the pan. Turn the dough over to coat the other side with the olive oil. Continue to stretch the dough to fit the pan (it will eventually go into place). As you are doing so, spread your fingers out and make finger holes all the through the dough. It sounds strange but when the dough rises again it will create the characteristic craggy looking focaccia. If you do not make the actual holes in the dough, the finished product will be very smooth.
  • Put the dough in a warm place until it has doubled in size, about 1 hour. While the dough is rising a second time, preheat the oven to 425F.
  • Liberally sprinkle the top of the focaccia with some coarse salt and lightly drizzle a little oil on top.
  • Bake the dough until the top of the loaf is golden brown, about 20-30 minutes. 20 minutes was perfect for the 9″ rounds. It does brown fast towards the end so keep your eye on it. Remove the focaccia from the oven and resist every urge to tear into it immediately. Let it cool keeping the steam inside and intact, leaving you with a very moist bread. Carefully remove from the jelly roll pan whole after it has been out of the oven for 10 minutes.

Garlic Naan

This recipe from Chaos in the Kitchen makes 8 large flat breads, preps in about 15 minutes, rises for 1 ½ hours, and cooks in about 20 minutes. I’ll have to remember to take a picture next time, but wanted to share the recipe, since it was so easy, and so, so good.

Ingredients:

  • 1 cup warm water
  • 2 tsp, or 1 package, Active dry yeast
  • ¼ cup sugar
  • 2 tsp salt
  • 3 tbsp milk
  • 1 egg, beaten
  • 4 ½ cup bread flour or all purpose flour, approximately
  • 2 tsp minced garlic
  • ¼ cup melted butter

Directions:

  1. Combine warm water and yeast in a bowl and let stand until frothy.
  2. Stir in sugar, salt, milk and egg until thoroughly combined.
  3. Begin folding in flour 1 cup at a time until you have a workable ball of dough that isn’t too sticky.
  4. Turn dough out onto a floured surface and knead until smooth and elastic.
  5. Place dough in an oiled bowl, turn to coat, cover with a damp cloth and set someplace warm to rise for 1 hour.
  6. Once dough has risen, punch down and knead in minced garlic. Alternately you can leave out the garlic for regular naan.
  7. Form dough into 8 balls. set out on an oiled cookie sheet to rise for 30 minutes. Cover with a damp cloth.
  8. While dough is rising heat a grill pan, griddle, or heavy skillet to medium high heat.
  9. Roll out one ball into a thin circle about the size of a pancake or the size you want your bread to be.
  10. Brush the surface or the grill with oil and place the dough circle on the hot surface.
  11. Cook several minutes or until brown, brush the uncooked side with melted butter and flip over to cook.
  12. Brush the cooked side with butter and once browned underneath, remove to a plate and keep warm in a warm oven or under a dish towel.
  13. Repeat with all dough balls: roll out, grill one side, brush with butter, flip, brush with butter, remove.
  14. Serve warm, sprinkled with chopped parsley or cilantro if desired.

Chicken Gyros with Tzatziki & Homemade Pita Bread

We’re big fans of gyros around here. While we love going to the local Greek diner to have the more authentic version with a side of greasy fries, I am even more in love with the fact that we’ve found a way to enjoy them at home with a lot less fat, but no compromise on flavor. I have to thank Elly Says Opa! for her chicken filling and tzatziki recipes. They’re both quite famous on the message board I frequent, and I can completely understand why. After a little searching, I came across Brown Eyed Baker’s post on Homemade Pita Breads. I love a bread recipe that you can goof up and it still turns out a-okay.

As I noted below, I used breast meat for our gyros, and they turned out great. The marinade is so rich and flavorful, that it keeps the chicken really, really juicy. I served our pitas with a selection of veggies that you can see below, as well as some baked onion rings and sweet potato fries. It was like having a “healthy” diner right in our own kitchen. Any leftovers are great as gyros again, but the pita bread could be cut into wedges and baked at 350⁰ for about 10 minutes to make “chips” to dip into extra tzatziki. Yum!

Freshly baked pita breads cooling before being made into gyros.

The platter of toppings and sides waiting for the pitas and chicken to be ready

A chicken gyro ready to be enjoyed!

Ingredients:

Pitas:

  • 3 cups flour
  • 1 ½ tsp Salt
  • 1 Tbsp Sugar or Honey
  • 1 packet, or 2 tsp, Yeast
  • 1 ¼ – 1 ½ cups Water, room temperature
  • 2 Tbsp Olive Oil, Vegetable Oil, Butter, or Shortening

Tzatziki:

  • 32oz. Yogurt, Plain (Fat free is not recommended, but a fat free Greek yogurt like Fage will be OK, since it’s strained & thicker)
  • 1 Hothouse Cucumber, or 2 Regular Cucumbers, seeded
  • 3-5 cloves Garlic, depending on your tastes, crushed
  • 1-2 tsp White Wine Vinegar
  • Salt
  • Pepper
  • Squeeze Fresh Lemon Juice (optional)

Chicken:

  • 1 ¼ lbs. Chicken (I usually use breast meat, but thighs will work as well)
  • 4 cloves garlic, smashed
  • Juice of 1 lemon
  • 2 tsp Red Wine Vinegar
  • 2 Tbsp Olive Oil
  • 2 Tbsp Plain Yogurt
  • 1 Tbsp Oregano, dried
  • Salt
  • Pepper

Toppings & Sides:

  • Tomatoes, sliced
  • Red Onion, quartered and sliced thin
  • Cucumber, sliced thin
  • Pepperocini
  • Kalamata Olives
  • Hummus

Directions:

Pitas:

  1. Mix the yeast in with the flour, salt, and sugar. Add the olive oil and 1 ¼ cup water and stir together with a wooden spoon. All of the ingredients should form a ball. If some of the flour will not stick to the ball, add more water [I had to add a bit more water].
  2. Once all of the ingredients form a ball, place the ball on a work surface, such as a cutting board, and knead the dough for approximately 10 minutes. If you are using an electric mixer, mix it at low speed for 10 minutes. I did it by hand and 10 minutes was dead on as far as a time estimate.
  3. When you are done kneading the dough, place it in a bowl that has been lightly coated with oil. Form a ball out of the dough and place it into the bowl, rolling the ball of dough around in the bowl so that it has a light coat of oil on all sides. Cover the bowl with plastic wrap or a damp kitchen towel and set aside to rise until it has doubled in size, approximately 90 minutes.
  4. When it has doubled in size, punch the dough down to release some of the trapped gases and divide it into 8 pieces. Roll each piece into a ball, cover the balls with a damp kitchen towel, and let them rest for 20 minutes. This step allows the dough to relax so that it’ll be easier to shape.
  5. While the dough is resting, preheat the oven to 450⁰. If you have a baking stone, put it in the oven to preheat as well. If you do not have a baking stone, turn a cookie sheet upside down and place it on the middle rack of the oven while you are preheating the oven. This will be the surface on which you bake your pitas.
  6. After the dough has relaxed for 20 minutes, spread a light coating of flour on a work surface and place one of the balls of dough there. Sprinkle a little bit of flour on top of the dough and use a rolling pin or your hands to stretch and flatten the dough. You should be able to roll it out to between 1/8 and 1/4 inch thick – 6 inches in diameter. If the dough does not stretch sufficiently you can cover it with the damp towel and let it rest 5 to 10 minutes before trying again.
  7. Place discs on a lightly greased baking sheet, or parchment paper, and let rise, uncovered, until barely doubled in thickness, about 30-45 minutes.
  8. Open the oven and place as many pitas as you can fit on the hot baking surface. They should be baked through and puffy after 3 minutes. If you want your pitas to be crispy and brown you can bake them for an additional 3 to 5 minutes, but it isn’t necessary. I baked mine for about 5 minutes each.

Tzatziki:

  1. Strain yogurt using cheesecloth, or a strainer lined with a coffee filter, over a bowl for several hours or overnight to get out as much moisture as possible.
  2. Peel and seed the cucumber. Shred the cucumbers and then squeeze the life out of them to get rid of as much excess moisture as possible. I use a towel to do this, and you will get a lot of liquid so don’t skip this step! Yes, there is a lot of straining and squeezing–and it’s all important! You don’t want a runny tzatziki
  3. Mix together the strained yogurt, shredded cucumbers, garlic, vinegar and lemon juice (if desired). Salt to taste. It’s best to refrigerate for 30 minutes or more before serving, so flavors can meld.

Chicken:

  1. Whisk together the garlic, lemon juice, vinegar, oil, yogurt, and oregano in a bowl. Add the chicken and rub the marinade in. Cover and refrigerate for about an hour.
  2. Preheat the broiler, grill, or pan on the stove. Sprinkle the chicken with salt and pepper on both sides, and then broil until cooked through, about 5 minutes per side, depending what size/type chicken you are using. Allow the chicken to rest for a few minutes before slicing into strips.

Assembly:

  1. Top the pita with the chicken, tzatziki, and your choice of toppings. I like cucumbers, tomatoes, and just a few onions.
  2. Fold up and eat. Opa!

Chile-Cheese Quick Bread

This is, yet another, recipe that came through on my Google Reader that I just couldn’t resist. I immediately thought it would go great with the Chicken Chili I was planning to make, or maybe it was the other way around. No matter, it was definitely on the menu for a cold Saturday night at our house. My only “issue” with this recipe was the baking time. It might have just been my oven, but the original recipe calls for baking for 45 to 50 minutes, and I wish I would have left it in for 50 to 55 minutes. Seems slight, but I would have liked every slice to have the flaky, buttery texture that the end pieces and top seemed to have, as the middle and bottom were a little mushy. Great flavor though, and I will be making again sometime soon.

Ingredients:

  • 2 cups all-purpose flour
  • 2 tsp granulated sugar
  • 1 Tbsp Baking Powder
  • 1 tsp freshly ground black pepper
  • 1 tsp salt
  • 4 oz. /1 cup Sharp Cheddar Cheese, shredded
  • 1 cup whole milk
  • 1/3 cup vegetable oil
  • 1 egg
  • 1 4 oz. can Chopped Green Chiles
  • 3 Tablespoons Jalapeño, veined, seeded, and finely chopped
  • 1/2 cup Red Pepper, finely chopped


Directions:

  • Preheat the oven to 375⁰. Grease or spray an 8×3 inch loaf pan.
  • Sift together the flour, salt, pepper, sugar, and baking powder in a medium bowl. Add the cheese and gently toss and stir until it is evenly distributed throughout the mixture.
  • Whisk the milk, oil, egg, green chiles, jalapeño, and red bell pepper in another bowl. Make a well in the center of the flour and cheese mixture, and pour the milk mixture in the center. Briefly blend with a spatula, only until the dry ingredients are just incorporated.
  • Pour the batter into the prepared pan, and place in the oven. Bake until the top is golden-brown, and springs back when touched in the center, about 50 to 55 minutes. Cool on a rack for 10 minutes, then remove the bread from the pan and cool completely.

French Bread – Take Two

The last time I made this bread from the Kitchen Aid booklet, it did not turn out well . . . at all. This time around I couldn’t be happier with the results. I adapted the recipe slightly, as I have been using bulk yeast rather than the packets, and instead of the egg wash, I brushed the loaf with butter before and after baking. I think the total time in labor was about 30 minutes. Honestly, if I ran to the store to buy bread for dinner, it would have taken longer, cost more, and my house would not have smelled as wonderful.

Ingredients:

  • 2 packages active dry yeast (2 tsp)
  • 2 1/2 cups water (110F to 120 F)
  • 1 tablespoon salt
  • 1 tablespoon melted butter
  • 7 cups all-purpose flour (can substitute 1 cup powdered milk)
  • 1 Tbsp sesame seeds
  • 2 Tbsp butter, melted


Directions:

  1. Dissolve yeast in warm water in warmed mixer bowl. Add salt, butter, and flour. Attach bowl & dough hook to mixer, turn to Speed 2 and mix about 1 minute or until well blended. Knead on Speed 2 about another 2 minutes longer. Dough will be sticky.
  2. Put dough in large greased bowl, turning to coat. Cover and let rise in warm place, free from draft, about 1 hour, or until doubled in bulk.
  3. Punch dough down and divide in half. Roll each half into 12″ x 15″ rectangle. Roll dough tightly, from longest side, tapering ends, if needed/wanted. Put loaves on greased baking sheets that have been dusted with cornmeal. Cover and let rise in warm place, free from draft, about 1 hour, or until doubled in bulk.
  4. With sharp knife, make 4 diagonal cuts on top of each loaf. Brush with half of the melted butter. Bake at 450⁰ for 25 minutes, then remove from oven.
  5. Brush loaves with remaining butter.
  6. Immediately remove from baking sheets and cool on wire racks.

Chocolate-Peanut Butter-Marbled Banana Bread


Not that anyone ever enjoys throwing away bad food, but Jim really hates it. That being said, he’ll eat things past their prime simply to avoid throwing them away, where I will feel badly while throwing food away, but not badly enough to waste the calories on a substandard snack. It is because of this that I’ve had to remind him more than a few times that there is no need for him to eat the bad bananas; I can make banana bread with them. We recently had this conversation, yet again, while I was filing through my latest batch of Google Reader entries when I found this recipe on Sugar Plum‘s blog and knew that I had found my current batch of over ripe banana’s future incarnation. Chocolate, Peanut Butter, and Banana all in one baked treat? How could you go wrong? I do wish I would have marbled the batters a little more, but I’ll know for next time, and the overall result is still really tasty.


Ingredients:

  • 2 1/3 cups all-purpose flour
  • 1 teaspoon baking powder
  • 1 teaspoon baking soda
  • 1/2 teaspoon salt
  • 1/3 cup semi or dark chocolate chips
  • 1/3 cup peanut butter chips
  • 2 medium bananas, mashed
  • 3/4 cup creamy peanut butter
  • 1/2 cup granulated sugar
  • 1/2 cup packed brown sugar
  • 2 large eggs
  • 1 1/2 teaspoons vanilla extract
  • 1/2 cup milk
  • 1/4 cup unsweetened cocoa powder


Directions:

  1. Preheat oven to 350 degrees F. Butter and flour a 9-inch loaf pan.
  2. In a medium bowl, sift together flour, baking powder, baking soda and salt; whisk in chocolate and peanut butter chips until combined. In a large mixing bowl, using a mixer on medium speed, beat together banana and peanut butter until creamy, about 1 minute; beat in granulated sugar and brown sugar until creamy, about 1 minute. Beat in eggs and vanilla until combined. Reduce mixer speed to low and gradually beat in flour mixture, alternating with milk, until well combined – about 2 minutes.
  3. Divide half of the batter into medium bowl; sift in cocoa powder, and beat until combined. Alternate spoonfuls of banana batter and chocolate batter into the pan. When all the batter is in the pan, swirl a knife sparingly through the batters to marble them. Sprinkle with additional chocolate and peanut butter chips, if desired.
  4. Bake for 60-65 minutes or until bread pulls away from pan, is well risen, deep golden brown, and a toothpick inserted comes out with moist crumbs attached. Cool on a wire rack for 1 hour; run a knife around outer edges and invert onto wire rack to cool completely before slicing.

Herbed Pull-Apart Dinner Rolls

Really easy, and quite yummy. I’ll probably bake them for a little less than the recipe recommends next time, as I would like them a little softer. Other than that, it was a great easy recipe that’s way more impressive than popping open a tube of biscuits.


Directions:

  • 1⁄2 cup low-fat milk
  • ¼ cup sugar
  • 2 teaspoons salt
  • 3 tablespoons butter or margarine
  • 3 packages active dry yeast
  • 11⁄2 cups warm water (105°F to 115°F)
  • 5-6 cups all-purpose flour
  • ¼ cup butter, softened
  • 2 Tbsp assorted dried herbs, I use Penzey’s Pasta Sprinkle


Ingredients:

  1. Place milk, sugar, salt, and butter in small saucepan. Heat over low heat until butter melts and sugar dissolves. Cool to lukewarm.
  2. Dissolve yeast in warm water in warmed mixer bowl. Add lukewarm milk mixture and 41⁄2 cups flour. Attach bowl and PowerKnead™ Spiral Dough Hook to mixer. Turn to Speed 2 and mix about 1 minute.
  3. Continuing on Speed 2, add remaining flour, 1⁄2 cup at a time, and mix about 11⁄2 minutes, or until dough starts to clean sides of bowl. Knead on Speed 2 about 2 minutes longer, or until dough is smooth and elastic. Dough will be slightly sticky to the touch.
  4. Place dough in greased bowl, turning to grease top. Cover. Let rise in warm place, free from draft, about 15 minutes.
  5. Mix butter and herbs. Set aside.
  6. Turn dough onto lightly floured surface. Roll into about a 9×13 sheet. Spread butter mixture onto dough. Cut into 6 even strips, about 2 inches each. Stack strips on top of one another, and then cut into 12 pieces and place into muffin tin cut side down.
  7. Cover. Let rise in slightly warm oven (90°F) about 15 minutes.
  8. Bake at 425°F for 12 minutes, or until golden brown. Remove from pans immediately and cool on wire racks.

French Bread

This is the recipe from the booklet that came with my Kitchen Aid stand mixer. I figured it was as good of a place as any to start with my first attempts at bread baking. While we’re on the subject of the Kitchen Aid stand mixer, I would like to point out that I am in love with mine. I’ve wanted one ever since I was a little girl and used my Great Aunt’s for making whipped cream for pies at the holidays. I often joked that registering for my Kitchen Aid mixer was one of the reasons for getting married. I am only kidding . . . half kidding. No, seriously, I’m kidding.

Moving on, this was a fairly easy recipe and was successful enough that I am looking forward to trying my hand at perfecting this, it was a little dense and over done, and trying other bread recipes. In the meantime, it makes a mean baked garlic bread the second day.


Ingredients

  • 2 packages active dry yeast (4 ½ tsp)
  • 2 1/2 cups water (110F to 120 F)
  • 1 tablespoon salt
  • 1 tablespoon melted butter
  • 7 cups all-purpose flour (can substitute 1 cup powdered milk)
  • 2 tablespoons cornmeal
  • For the crust:
  • 1 egg white
  • 1 tablespoon cold water


Directions

  1. Dissolve yeast in warm water in warmed mixer bowl. Add salt, butter, and flour. Attach bowl & dough hook to mixer, turn to Speed 2 and mix about 1 minute or until well blended. Knead on Speed 2 about another 2 minutes longer. Dough will be sticky.
  2. Put dough in large greased bowl, turning to coat. Cover and let rise in warm place, free from draft, about 1 hour, or until doubled in bulk.
  3. Punch dough down and divide in half. Roll each half into 12″ x 15″ rectangle. Roll dough tightly, from longest side, tapering ends, if needed/wanted. Put loaves on greased baking sheets that have been dusted with cornmeal. Cover and let rise in warm place, free from draft, about 1 hour, or until doubled in bulk.
  4. With sharp knife, make 4 diagonal cuts on top of each loaf. Bake at 450F for 25 minutes, then remove from oven.
  5. Beat egg white and water together and brush each loaf with this mix. Return to the oven and bake 5 minutes longer.
  6. Immediately remove from baking sheets and cool on wire racks.