Chipotle Bean Burritos

Oh, the New Year’s Resolution. We all make them. Even if we say we don’t, we’re lying, as I truly believe some part of you gets to thinking that it’s a new year and new chance to make some positive changes. I mean, I really don’t think anyone wakes up on January 1st and declares, “This year, I’m going to drink more, and, while I’m at it, I think I’ll pick up smoking and skip any form of exercise!” Unfortunately, these resolutions have become a cliché, as most of us drop them within the month, which is a shame.

Prior to January 1st, 2011, I resolved, not to start eating healthier, but to go back to the track I was on prior to the beginning of November. Yes, going all the way back to November there was a steady stream of events: Carter’s 2nd Birthday Party, Parents vising from Colorado, Work trip to Philly, Thanksgiving, Getting together with friends, Christmas celebrations, and, of course, New Year’s Eve. These events all included delicious food, cocktails, and, at times, scrumptious desserts. Of course, I could have been “good”, but I wanted to enjoy myself, and for a foodie, that means giving things a try. Also, family get-togethers MUST include wine. There’s really no two ways around that one. J If you follow the blog, please look forward to quite a few new posts on healthy, and delicious, meals to get you on track as well. I added in the delicious part since I believe it’s vitally important that you enjoy what you’re eating, otherwise it will be all too easy to go back to the “bad” foods in full force.

One final note, before I get onto the actual recipe, if you know me, you also know that I enjoy my share of bad foods. I have no shame in that. Though, what I always try to ensure is that these “bad” foods are kept in moderation. So, while I never plan to give up McDonald’s completely, I do my best to limit it to 1 time per month, and then make strategic choices when I do go. My standard order is a hamburger, small fry, and a medium diet coke, which clocks in at 480 calories. You’ll find that most nation-wide restaurants have very accurate nutritional information on their websites, many of which are interactive. Check them out and become educated on your choices. You’ll be surprised to learn just how big of a difference switching your grande caramel macchiato from 2% to skim milk makes (50 calories and 6 grams of fat), or what skipping the whipped cream can do (skipping 130 calories and 12 grams of fat).

When I saw this recipe courtesy of Cooking Light on MyRecipes.com, I knew it would be a great start to kicking things off in the right direction. Not only was it a delicious, healthy, and meat free dinner, the leftovers have provided quick and healthy lunches. I made only minor adjustments to the original recipe: increasing the chipotle powder and adding fresh cilantro to the toppings. Feel free to adjust to your family’s particular tastes.


Ingredients:

  • 1 Tbsp Olive Oil
  • 1 clove Garlic, minced
  • 1 tsp Chipotle Powder
  • ¼ tsp Salt
  • ½ cup Water
  • 1, 15 oz. can Black Beans, drained
  • 1 15 oz. can Kidney Beans, drained
  • 6 Tbsp Refrigerated Fresh Salsa
  • 6 10″ Reduced-Fat Flour Tortillas (such as Mission)
  • 1 cup Reduced-Fat Cheese, Cheddar and/or Monterey Jack, shredded
  • 1 ½ cups Roma Tomatoes, chopped
  • 1 ½ cups Romaine Lettuce, shredded
  • ½ cup Cilantro, chopped
  • 6 Tbsp Green Onions, thinly sliced
  • 6 Tbsp Light Sour Cream

Preparation

  1. Heat oil in a large nonstick skillet over medium heat. Add garlic to pan; cook 1 minute, stirring frequently.
  2. Stir in chile powder and salt; cook 30 seconds, stirring constantly. Stir in water and beans; bring to a boil.
  3. Reduce heat, and simmer 10 minutes. Remove from heat; stir in salsa. Partially mash bean mixture with a fork.
  4. Warm tortillas according to package directions.
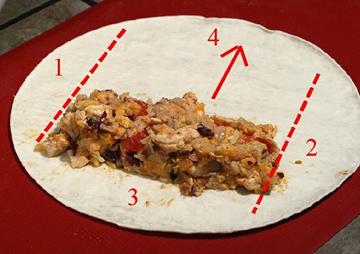
  5. Spoon about 1/3 cup bean mixture into center of each tortilla. Don’t overfill!
  6. Top each serving with about 2 1/2 tablespoons cheese, 1/4 cup tomato, 1/4 cup lettuce, 1 tablespoon onions, and 1 tablespoon sour cream; roll up.

Roasted Shrimp Cocktail with Horseradish Sauce

I heard numerous raves on this recipe from Ina Garten, and after trying it a few nights ago, I can understand why. The shrimp have a delicious flavor, and aren’t rubbery or water logged like traditional shrimp cocktails. The sauce starts from a bottle, but is given extra zip and flavor with a few simple additions.


Ingredients:

Roasted Shrimp:

  • 2 pounds (12 to 15-count) Shrimp
  • 1 Tbsp Olive Oil
  • ½ tsp Kosher Salt
  • ½ tsp Black Pepper, freshly ground

Horseradish Sauce:

  • ½ cup Chili Sauce (recommended: Heinz)
  • ½ cup Ketchup
  • 3 Tbsp Prepared Horseradish
  • Juice of ½ a Lemon
  • ½ tsp Worcestershire Sauce
  • ¼ tsp Tabasco

Directions:

Roasted Shrimp:

  1. Preheat the oven to 400.
  2. Peel and devein the shrimp, leaving the tails on. Place them on a sheet pan with the olive oil, salt, and pepper and spread them in 1 layer. Roast for 8 to10 minutes, just until pink and firm and cooked through. Set aside to cool.

Horseradish Sauce:

  1. For the sauce, combine the chili sauce, ketchup, horseradish, lemon juice, Worcestershire sauce, and hot sauce. Serve as a dip with the shrimp.

Pomegranate-Glazed Salmon

We were surprisingly gifted a filet of salmon, so I needed to find a delicious and quick week-night worthy recipe for it. I shouldn’t be surprised that my search brought me to The Way the Cookie Crumbles and Bridget’s recipe for this great dish. Not only was it a great way to enjoy our newly acquired fish, it was also an opportunity to use my find of Tabasco Brand Soy Sauce. The mix of sweet and heat was a perfect complement to the fish. I highly recommend giving this a try soon.


Ingredients:

Marinade:

  • 2 Tbsp Soy Sauce
  • 1 Tbsp Agave Nectar
  • 2 Garlic cloves, smashed
  • 2 tsp Ginger, finely grated
  • 2 Tbsp Fresh Lemon Juice
  • 1 Tbsp Extra-Virgin Olive Oil
  • ½ tsp Kosher Salt
  • ½ tsp White Pepper, freshly ground
  • 4 (6-ounce) skinless salmon fillets

Glaze:

  • 1 Tbsp Soy Sauce
  • 1 Tbsp Agave Nectar
  • 1 Garlic clove, minced
  • 1 tsp Ginger, finely grated
  • 1 tsp Lemon Zest, finely grated
  • ½ cup Pomegranate Juice
  • Salt

Directions:

  1. Combine all of the marinade ingredients in a large, shallow dish. Add the salmon fillets and turn to coat. Cover and refrigerate for 1 hour, turning a few times.
  2. Meanwhile, in a medium bowl, mix all of the glaze ingredients except the pomegranate juice. In a small saucepan, simmer the juice over medium-high heat until reduced to 2 tablespoons. Stir into the other glaze ingredients.
  3. Adjust an oven rack to 4 inches below the broiler; heat the broiler. Line a rimmed baking sheet with foil; arrange the salmon fillets, skin side down, on the prepared pan. Season with salt and brush with half of the glaze. Broil for about 3 minutes, until the fillets begin to brown. Brush the fillets with the remaining glaze and broil for about 3 minutes longer, until richly glazed and the fish is just cooked through. Serve immediately.

Meg’s Harvest Salad

This recipe is quite famous. Well, famous within our family. My cousin Megan, who is a fairly well-known equestrian and owner of Vintage View Farms in Mequon (plug, plug), came up with this delicious mix, and we started to request it so often that she finally wrote it down for us. I hadn’t had it in a while, but when Jim recently requested, “One of those fruit and nut salads you’ve been making lately” for dinner, this mix of nuts, cheese, and cranberries popped into my head.

This was just as yummy as I remember, maybe even more so, as I’ve developed a love for blue cheeses that I didn’t have 5 years ago. I made only slight changes such as using white balsamic and toasting the nuts to bring out their flavor. Make a batch of the dressing, and keep it in the refrigerator for this and any other salad you can whip up, as the flavors are quite versatile.

Ingredients:

Dressing:

  • ¼ cup Balsamic Vinegar, I prefer white
  • ½ cup Extra Virgin Olive Oil
  • 2 Tbsp Honey
  • 2 Tbsp Sesame Seeds
  • 2 Tbsp Chives, finely minced
  • ½ tsp Salt
  • ½ tsp Pepper, freshly ground
  • 1 tsp Lime Juice, fresh

Salad:

  • ¼ cup Pine Nuts
  • ¼ cup Walnuts, chopped
  • ¼ cup Sunflower Seeds
  • ½ cup Gorgonzola, crumbled
  • ½ cup Dried Cranberries
  • ¼ cup Parmesan Cheese, shredded
  • 1 to 2 heads Romaine, washed and torn
  • 2 to 4 cups Lettuce Mix: your choice of escarole, green leaf, red leaf and/or parsley, etc.

Directions:

Dressing:

  1. Add all ingredients into a lidded jar. Seal tightly and shake until combined and slightly thickened.

Salad:

  1. In a dry skillet, lightly toast the pine nuts and walnuts. Add in bowl with dressing and all other ingredients except for lettuce. Let sit for up to 1 hour to allow the flavors to meld.
  2. To serve, place lettuce in a large serving bowl and top with dressing mixture. Toss and enjoy.    


Dressing: Servings – 12 / WW Points – 3 pts per serving per 2 Tbsp serving

Salad: Servings – 8 / WW Points – 4 pts

Classic and Delicious Chicken Pot Pies

Alright, I hate to do this again, but it’s by special request that I post this recipe, even though I wasn’t able to get a great pic of the final product. If you really, really need to know what pot pie looks like, feel free to check out the original recipe on Ezra Pound Cake’s blog. I promise to update next time we enjoy, so that I can include the picture, but please make it without one, and soon. This is everything you want pot pie to be, and more. The epitome of comfort in a bowl topped with a flakey and savory pastry. The pastry recipe makes a large batch, so if you’re planning on freezing the filling, only make half the topping, and then make a fresh batch when you’re enjoying the leftovers.

Here’s a picture from some leftovers:


Ingredients:

Filling:

  • 1 Tbsp unsalted butter
  • 1 medium-size yellow onion, chopped
  • 1 large russet potato, peeled and diced
  • 3 cloves garlic, minced
  • 1 red bell pepper, diced
  • 8 ounces button mushrooms, sliced
  • 1/2 teaspoon crushed red pepper flakes
  • Salt and freshly ground black pepper
  • 2 to 3 large, bone-in, baked Chicken Breasts
  • 4 cups frozen vegetables such as peas, cut green beans, diced carrots, and/or corn

Sauce:

  • 5 Tbsp Unsalted Butter
  • 1 cup all-purpose flour
  • 2 1/2 cups chicken stock, preferably homemade
  • 1 cup 1% Milk
  • Dash of hot pepper sauce, such as Tabasco
  • Salt and freshly ground white pepper

Crust:

  • ¾ cup, 1 ½ sticks, Unsalted Butter
  • 2 ¼ cups all-purpose flour
  • 6 ounces chilled cream cheese
  • ¾ to 1 cup Ice Water
  • 1 teaspoon salt
  • 1/4 teaspoon freshly ground white pepper
  • 1 large egg

Directions:

Filling:

  1. Melt the butter in a large sauté pan set over medium heat. Add the onion and potato; sauté for 5 minutes. Add the garlic, bell pepper, and mushrooms and sauté about 15 minutes, until the potatoes are tender. Stir in the crushed red pepper and add salt and pepper to taste.
  2. While the vegetables are sautéing, skin the chicken, pull the meat off the bones, and shred the meat or cut into bite-size pieces. Set aside.
  3. Stir the frozen vegetables and chicken into the vegetable mixture. Set the filling aside.

Sauce:

  1. Melt the butter over medium heat in a large saucepan. Add the flour and whisk until smooth. Whisk in the chicken stock and cook the sauce over medium heat until it thickens to the consistency of a cream soup. Add the milk, hot pepper sauce, and salt and white pepper to taste.
  2. Pour the cream sauce over the chicken filling and stir to combine.
  3. Fill individual 1 ¼ cup capacity oven-safe bowls three-quarters of the way to the top, or a large casserole dish, with the creamed chicken filling.

Crust:

  1. Preheat the oven to 375.
  2. Cut the butter into 16 pieces. In the bowl of a food processor fitted with a metal blade, pulse the butter and flour until crumbly. Add the cream cheese, salt, and white pepper. Add water about 2 Tbsp at a time while continuously pulsing just until the dough forms a ball.
  3. Set the dough on a flat surface dusted with flour. Use a floured rolling pin to roll the dough out to 1/4-inch thickness.
    1. If making individual pot pies, measure the diameter of the pot pie bowls and cut out dough rounds that are 1 ½ inches larger in diameter. Whisk the egg in a small bowl. Lay the dough rounds on top of the pot pies, making sure the dough hangs evenly over each bowl.
    2. For a casserole: Either cover the entire dish with one large sheet of dough, or place the dough on a separate cookie sheet lined with a silpat or parchment paper. Cut into desired shapes, you could get creative and seasonal here, and bake. Once they’re done, you can spoon the filling into individual plates or bowls, and then top with the crusts.
  4. Brush the dough lightly with the beaten egg.
  5. Bake the pies for 20 to 25 minutes, until golden brown. Serve immediately.


Servings – 12

WW Points – 9 pts per serving

Sesame Chicken with Snow Peas

I’m down to 2 magazines, Bon Appétit and Food Network. This is big. I was recently subscribing to 5, but I cancelled InStyle, Clean Eating and Real Simple. There wasn’t anything wrong with those magazines; I just looked around one day and realized I was drowning in stacks and stacks of issues from previous months. It was more business than pleasure.

This recipe is from the latest issue of Food Network Magazine. We loved it. It was savory, spicy, sweet (hey, that reminds me of a blog I know …) Anyways, we really enjoyed it, and I particularly enjoyed that the chicken had a ton of flavor without a lot of extra fat or calories from breading and frying before tossing the chicken with the sauce.

Oh, by the way, in the spirit of full disclosure, I get Martha Stewart Living too, but I don’t pay for it, so it doesn’t count. Not that I steal it from the neighbor or anything, it was a promotional subscription.

Ingredients:

  • 5 Tbsp Low-Sodium Soy Sauce
  • 4 tsp Toasted Sesame Oil
  • 2 tsp Honey
  • 1 ¼ pounds skinless, boneless Chicken Breasts, cut into 3/4-inch chunks
  • 6 tsp Canola Oil
  • 2 Scallions, thinly sliced
  • 1 Tbsp Ginger, grated
  • 3 cloves Garlic, minced
  • 1 ¼ cups Chicken Broth
  • 3 Tbsp Sugar
  • 4 tsp Cornstarch
  • 1 Tbsp Rice Vinegar
  • 1 tsp Chile Paste
  • 4 cups Snow Peas, trimmed
  • 2 cups Cooked Brown Rice, for serving (optional)
  • 2 Tbsp toasted Sesame Seeds

Directions:

  1. Whisk 3 tablespoons soy sauce, 2 teaspoons sesame oil and the honey in a bowl. Toss in the chicken and marinate 20 minutes.
  2. Remove the chicken from the marinade using a slotted spoon. Heat 2 teaspoons canola oil in a nonstick skillet over medium-high heat. Cook the chicken in 2 batches; turning once or twice, until browned, 3 to 5 minutes (add 2 more teaspoons canola oil between batches). Transfer the chicken to a plate and wipe out the skillet.
  3. Heat the remaining 2 teaspoons canola oil in the skillet. Add the scallions, reserving some of the green parts for topping. Add the ginger and garlic and cook, stirring, 1 minute. Whisk the broth, sugar, cornstarch, vinegar, chili paste and the remaining 2 tablespoons soy sauce in a bowl; add to the skillet and cook, stirring, until thickened, 3 to 4 minutes. Stir in the remaining 2 teaspoons sesame oil.
  4. Meanwhile, cook the snow peas in a steamer basket set over a few inches of boiling water until crisp-tender, 2 to 3 minutes.
  5. Return the chicken to the skillet with the sauce and heat through. Serve the chicken and snow peas over brown rice, if desired. Top with the sesame seeds and reserved scallion greens.


Servings – 4

WW Points – 9 pts per serving

Chicken Enchilada Soup

I’ll update once I have a better picture, but thought it was better to share without, than hold onto the deliciousness for myself. This recipe is originally from Real Mom Kitchen, and is great for a weeknight meal, as everything goes into the crockpot at once, and then cooks all day until you’re left with a yummy, warm, and satisfying soup. I served with a tossed green salad and chips and salsa.

Ingredients:

  • 1 15 oz. can Black Beans, rinsed and drained
  • 1 14.5 oz can Diced Tomatoes
  • 10 oz. Frozen Corn
  • ½ cup Onion, minced
  • 1 cup Bell Pepper, any color and/or combination, chopped
  • 2 Chicken Breasts, boneless-skinless
  • 1 10 oz. can Red Enchilada Sauce
  • 1 10.75 oz can Cream of Chicken Soup, 98% fat free
  • 1 ½ cups 1% Milk
  • 4 oz. Pepper Jack Cheese, shredded

Directions:

  1. In a 3 ½ to 5 quart slow cooker, combine drained beans, tomatoes, corn, onion, and bell pepper. Place 2 chicken breasts on top of mixture.
  2. In a large bowl, whisk together enchilada sauce and soup. Gradually whisk in milk until smooth. Pour sauce mixture over ingredients in cooker.
  3. Cover; cook on low heat for 6 to 8 hours or on high for 3 to 4 hours.
  4. Remove chicken and cut or shred into bite sized pieces. Add chicken back into soup.
  5. Top with pepper jack cheese and serve.
  6. Can also be topped with avocado, sour cream, or crushed tortilla chips.

Note: if the soup is too thick for you, just add a little more milk after it’s all cooked.


Servings – 12

WW Points – 3 pts per serving

Skillet Lasagna

Every week I make a meal plan. Every week I ask Jim if there is anything he’s like to see on it. Every week he says, “No”. Well, that was until this week when he said, “lasagna”, and I said, “No”. It wasn’t that I didn’t want lasagna; it’s just that I didn’t have the time. I felt badly, and went back to scrolling through recipes, when I came upon this recipe from Ezra Pound Cake.

This was a great weeknight meal to serve with a Caesar salad and some garlic bread. Oh, and of course a glass of wine, but by now that’s implied, right? I was a little nervous, as Jim was looking forward to a “crusty edge”, but he still very much enjoyed it. The recipe made a lot, so I saved some for leftovers, and stashed about half in the freezer for an even quicker weeknight meal in the weeks to come.


Ingredients:

  • 1 28 oz can Diced Tomatoes
  • Water
  • 1 Tbsp Olive Oil
  • 1 medium Onion, minced
  • Salt
  • 3 cloves Garlic, minced
  • ¼ tsp Red Pepper Flakes
  • ½ Ground Sirloin
  • ½ Italian Sausage
  • 9 Lasagna Noodles, broken into 2-inch lengths
  • 1 (8-ounce) can tomato sauce
  • ½ cup plus 2 tbsp Parmesan cheese, grated
  • Pepper
  • 1 cup Low-Fat Ricotta Cheese
  • 3 Tbsp Fresh Basil, chiffonade

Directions:

  1. Pour tomatoes with their juices into 1-quart liquid measuring cup. Add water until mixture measures 1 quart.
  2. Heat oil in a large nonstick skillet over medium heat until shimmering. Add onion and 1/2 teaspoon salt and cook until onion begins to brown, about 5 minutes. Stir in garlic and pepper flakes and cook until fragrant, about 30 seconds. Add meat and cook, breaking apart meat, until no longer pink, about 4 minutes.
  3. Layer pasta onto meat but do not stir. Pour diced tomatoes with juice and tomato sauce over pasta. Cover and bring to simmer. Reduce heat to medium-low and simmer, stirring occasionally, until pasta is tender, about 20 minutes.
  4. Remove skillet from heat and stir in 1/2 cup Parmesan. Season with salt and pepper. Dot with heaping tablespoons of ricotta, cover, and let stand off heat for five minutes. Sprinkle with basil and remaining 2 tablespoons Parmesan. Serve.


Servings – 10

WW Points – 6 pts per serving

Salmon with Sweet Chili Glaze

This recipe is originally from the April 2010 issue of Bon Appétit magazine. It was written to include a light vegetable sauté of snap peas and pea shoots, but since I couldn’t find the pea shoots, we enjoyed this with only the sauce. It was amazing. I highly recommend it, and think the glaze would also work very well on shrimp, chicken, and maybe even pork. Be careful though, it did pack more of a kick than I was expecting, we weren’t disappointed, just surprised.


Instructions:

  • Nonstick vegetable oil spray
  • 1/4 cup Asian sweet chili sauce*
  • 3 tablespoons soy sauce, divided
  • 2 tablespoons finely grated peeled fresh ginger, divided
  • 6 6-ounce salmon fillets with skin


Directions:

  1. Line rimmed baking sheet with foil. Coat with nonstick spray.
  2. Whisk chili sauce, 2 tablespoons soy sauce, and 1 tablespoon ginger in small bowl. Place salmon fillets, skin side down, on prepared sheet. Spoon chili sauce marinade over and let stand at room temperature 30 minutes.
  3. Preheat broiler. Spoon any marinade remaining on baking sheet over salmon fillets. Broil salmon without turning until browned in spots and almost opaque in center, 6 to 10 minutes, depending on thickness of fillet.


Servings – 6

WW Points – 6 pts per serving

Lime Angel Food Cake with Lime Glaze and Pistachios

Did you know I love to cook and entertain? I really, really do. Even if there is no one around, I’ll plate food as if I was on a cooking show. If it’s just our family, I see nothing odd about making a three course meal complete with dessert. I know for some, okay most, this is weird, but to me, it’s fun and relaxing. So, the fact that I woke up on a Sunday morning to make this cake for no particular reason other than wanting to, should not be surprising for anyone who knows, or is just getting to know, me.

When I was planning our weekend meals, which are usually a little more involved than those on weekdays since I have more time, I thought Sunday would be a good day for a nice summer meal of Spiced Chicken Bites, Corn on the Cob, Watermelon, and this cake from Bon Appétit’s April 2010 issue. Turns out that, when I’m right, I am right on. Although it was a little time consuming, this cake was delicious, and the perfect complement to a hot day and a spicy lunch. The cake itself is not overly sweet, with a slight tang from the lime zest. Then you get an extra zingy sweetness from the lime simple syrup and glaze, and finally a crunch from the pistachios. Perfection.


Ingredients:

Cake:

  • 1 cup Cake Flour
  • 1 ½ cups Superfine Sugar, divided
  • ¼ tsp Salt
  • 10 large Egg Whites, room temperature
  • 2 tsp Lime Zest
  • 1 tsp Vanilla Extract
  • 1 tsp Cream of Tartar

Lime Syrup & Glaze:

  • ½ cup Sugar
  • 4 Tbsp Fresh Lime Juice, divided
  • ½ cup Unsalted Raw Pistachios (about 2 ounces), finely chopped in processor or with a rolling pin and some muscles
  • ½ cup Powdered Sugar

Directions:

Cake:

  1. Position rack in center of oven and preheat to 350°F. Sift flour, 1/2 cup superfine sugar, and salt into medium bowl; repeat sifting 3 times.
  2. Using electric mixer, beat egg whites, lime peel, and vanilla on medium speed in large bowl until frothy (mixture may turn neon green but color will change when remaining ingredients are added). Add cream of tartar; increase speed to high and beat until soft peaks form.
  3. Gradually add remaining 1 cup sugar, 2 tablespoons at a time, beating until stiff peaks form. Sprinkle 1/3 of flour mixture over whites and gently fold in until incorporated. Fold in remaining flour mixture in 2 more additions just until incorporated. Transfer to ungreased 10-inch angel food cake pan with 4-inch-high sides and removable bottom (do not use nonstick pan); smooth top.
  4. Bake cake until pale golden and tester inserted near center comes out clean, about 38 minutes. Immediately invert cake onto work surface if pan has feet, or invert center tube of pan onto neck of bottle or metal funnel and cool cake completely.
  5. Using long thin knife, cut around cake sides and center tube to loosen. Lift out center tube with cake still attached; run knife between cake and bottom of pan to loosen. Invert cake onto rack, then turn cake over, rounded side up. Set rack with cake atop rimmed baking sheet.

Lime Syrup & Glaze:

  1. Combine sugar and 3 tablespoons lime juice in small saucepan; stir over medium heat until sugar dissolves. Brush syrup all over top and sides of cake. Immediately press pistachios onto top and sides of cake, pressing to adhere.
  2. Stir powdered sugar with remaining 1 tablespoon lime juice in small bowl until smooth. Drizzle glaze over top of cake. Let stand until glaze sets, about 10 minutes. DO AHEAD Cake can be made up to 1 day ahead. Cover with cake dome and store at room temperature.
  3. Transfer cake to platter; cut into wedges and serve.


Servings – 12

WW Points – 5 pts per slice