Caramelized French Onion Dip

I think the greatest part of the recent food, and food blogging, movement is remembering how good things can be. There are so many foods that we’re just used to buying premade, we had no idea that: 1. We could make them at home, and 2. They could taste 100x’s better than we ever thought. That was true with the marshmallows I made at Christmas, and it’s definitely true with this dip. I found this recipe on Chaos in the Kitchen and knew immediately that it would need to be featured on the menu for Jim’s 30th birthday. I didn’t change much, except for the addition of dried thyme, as I thought it would really well with the flavor of the onions, and I was right.

Ingredients:

  • 1 Tbsp Olive oil
  • 1 Tbsp Butter
  • 2 Large Onions, chopped
  • 2 Cloves Garlic, minced
  • 1 tsp Thyme
  • 1 tsp Beef Soup Base
  • ½ cup water
  • 2 tsp Worcestershire Sauce
  • 16 oz Sour Cream, I used low fat
  • 3 oz Cream Cheese, I used 1/3 less fat, softened

Directions:

  1. Heat butter and oil in a medium saucepan over medium heat.
  2. Cook onions and garlic until soft and browned. This will take about 20 to 30 minutes. I usually set a timer, and stir every 5 to 8 minutes.
  3. Add beef base and water and continue to cook until mixture is combined.
  4. Season with worcestershire sauce, thyme, and salt and pepper to taste. Can be made in advance, cool and refrigerate onion mixture until ready to use.
  5. Using a hand held mixer (if necessary), combine sour cream, cream cheese, and onion mixture. If you want your dip a little smoother, run a hand blender through it prior to chilling, but be sure to leave some onion bits.
  6. Chill dip at least 30 minutes or up to several days. Taste and adjust seasonings as desired before serving.
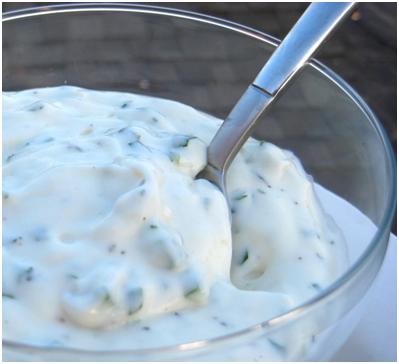
Jalapeño Ranch Dressing

We’ve been eating a lot of salads. A lot. Our favorite is a tossup (sorry for the pun) between a classic Caesar and a mixed green salad with ranch dressing. I usually, gasp, buy our salad dressings, as we’ve found some really great ones, and I would rather focus on other parts of the meal. That being said, I do occasionally get excited to try new ones that pop into my Google Reader, like this one from Joelen’s Culinary Adventures.

This was good, and I’ve only made two changes to the recipe below. The first is adjusting the amount of buttermilk. While this recipe is for a “dressing”, the final product was more of a “dip”. I have absolutely no problem with that, as it was a perfect dip for the Oven Fried Chipotle Chicken Tenders we enjoyed with it, but if you’re looking for a dressing to toss with a salad, I would increase the amount of liquid. Though, you may be best to keep it thick, and then whisk a few tablespoons with some milk to get the consistency you like in a dressing, and then toss with your salad. The second change was simply in the time I would encourage you to wait before enjoying. The longer, the better, as far as I’m concerned.


Ingredients:

  • ¾ cup Nonfat Greek Yogurt
  • ¼ cup Reduced Fat Mayo with Olive Oil (Kraft)
  • ½ cup. Light Sour Cream
  • ½ to 1 cup Lowfat Buttermilk
  • 2 Cloves Garlic, minced
  • 1 Jalapeño, minced
  • ½ tsp Dried Thyme
  • 1 tsp Fresh Chives, minced
  • ¼ tsp Garlic Powder
  • ¼ tsp Onion Powder
  • ½ tsp Salt
  • 1/2 tsp Pepper, freshly ground

Directions:

  1. In a bowl combine mayonnaise, sour cream, buttermilk, garlic, jalapeno, thyme, chives, garlic powder and onion powder. Season with salt and pepper.
  2. Refrigerate for, at least, 1 hour before serving.


Servings – 16

WW Points – 1 pt per 2 Tbsp serving

Restaurant Style Tomato Salsa

We’ve been on the hunt for a “perfect” salsa for quite some time now. We’ve tried different recipes, restaurants, brands, jars, cans, etc., but nothing quite hit all of the flavor profiles we were looking for. So, instead of a perfect salsa we love, we have a fridge full of so-so salsas that we’re struggling to use up before they have to be tossed. Quite the dilemma, right? Well, you’ll all be happy to know that our search has finally ended. Thanks to this recipe from Annie’s Eats, we have reached our own personal salsa nirvana.

This makes a very, very large batch of salsa, about 6 cups, so feel free to cut it in half if you’re not feeding a crowd. I wish I would have realized this before I started, because I am now trying to figure out how to use up a huge bowl of salsa before it goes bad.

Guess who’s having chips and salsa for lunch for the next week or so? Oh, the suffering I endure for my love of cooking.

Ingredients:

  • 2 fresh Jalapeño Peppers, coarsely chopped and seeded, if you can’t take the heat
  • 4 cloves Garlic, halved
  • 1 large Vine-Ripened Tomatoes, halved and quartered
  • 1 (14.5 0z.) can Diced Tomatoes, drained
  • 2 tbsp Red Wine Vinegar
  • 1 Tbsp Cumin
  • ½ Red Onion, coarsely chopped
  • ¼ tsp Salt
  • ½ tsp Chili Powder
  • ¼ cup Fresh Cilantro
  • Juice of 1 Lime

Directions:

  1. In the bowl of a food processor, combine the jalapenos and garlic. Process until finely chopped. Scrape down the sides of the bowl.
  2. Add all other ingredients to the food processor. Pulse in very brief pulses until the vegetables have reached the size you desire (it does not take many pulses so don’t overdo it).
  3. Transfer to an airtight container and refrigerate at least 2 hours, it’s even better the next day, before serving to allow the flavors to blend.

Tortilla Crusted Jalapeño Popper Stuffed Chicken Breasts

I recently made Jalapeño Popper Dip for a Packer party, and, while it was a hit, there was a good amount leftover. Now, I don’t know if you’ve heard or not, but there has been a lot of talk lately about the recession the country is current in. Though, apparently mall goers don’t know about it, because we had to park in the middle of nowhere yesterday to make some returns. Sorry, got off track there . . . where was I? Oh, yes, leftover dip. So, we had some of this leftover, and, not wanting to waste the deliciousness, the idea of stuffed chicken breasts popped into my head. And what a great idea it was indeed. Once you have the basic technique of a stuffed chicken breast down, the possibilities, for dinner and using leftover tasty dips, are virtually endless.

Ingredients:

Directions:

  1. Preheat oven to 350.
  2. Butterfly the thickest section of chicken breasts to create 2 halves. Place each breast in a large ziptop storage bag and pound it with the flat side of a meat mallet until ¼” – ½” thick.
  3. Season chicken with salt, pepper, and garlic. Add a desired amount of cheese stuffing on one half of each chicken breast. Try not to overfill. Gently press stuffing down and fold over other half of chicken breast; it does not have to seal.
  4. Coat with egg and then breadcrumbs, and lay seam-side down on a well-oiled baking sheet.
  5. Repeat with remaining chicken breasts.
  6. Bake for 25-35 minutes, or until the meat reaches 170. Allow to rest at least 10 minutes, then slice against the rolls and serve.

The Ultimate Buffalo Chicken Dip

By now, we’ve all had it, the now infamous Buffalo Chicken Dip inspired by the wings from upstate New York. When I first received this recipe it had about 5 ingredients and 4 steps. It was good, but I knew it could be better. Over the last 3 years or so that I’ve had this recipe, I have continuously been tweaking and modifying it, and, while all results were a crowd pleasing treat, the recipe below reflects what we believe to the best, and ultimate, in buffalo dip experiences. I avoided using “real” chicken breasts, because I thought the canned was just fine, which is was, but when I tried using one of our favorite seasonings on the chicken, I knew I could never go back to the can. Also, even though I knew the separation of the dip and hot sauce wasn’t grease, I still didn’t find it very appealing, and wanted to figure out how to keep it from occurring. Using much less than most recipes call for corrected this problem, but still gave a true buffalo flavor. You might find the use of a Mexican canned salsa an odd addition, but I discovered that it lends a nice layer of flavor and smokiness that stands in place of the fried chicken skin you get with each bite of a real Buffalo wing. Is this a little more effort than you will find with most Buffalo chicken dip recipes? Yes. Is it worth it? Most definitely!


Ingredients:

  • 2 boneless skinless chicken breasts, or the equivalent of chicken tenderloins
  • 2 tsp Seasoned Salt (I like Penzey’s Spicy 4S Special Seasoned Sea Salt)
  • 2 Tbsp olive oil, divided (optional)
  • ¼ cup chopped onion
  • ¼ cup chopped celery
  • 1 clove garlic, minced
  • 7 oz. can Salsa Ranchera
  • 16 oz. cream cheese, 2 blocks, room temperature
  • ¼ cup Frank’s Red Hot sauce
  • Tabasco, to taste
  • 1 cup Ranch dressing (I like Marzetti’s)
  • 2 cups cheese, shredded (I like Monterey jack and cheddar)
  • ¼ to ½ cup of blue cheese crumbles (depending on taste)
  • Potential Dippers:
    • Celery Sticks
    • Carrots Sticks
    • Zucchini Slices
    • Red Pepper Strips
    • Ciabatta Slices
    • Tortilla Chips, the thicker the better. This is no time for a wimpy chip!

Directions:

  1. Season chicken and sauté in pan over medium-high heat until cooked through, about 4 minutes on each side. If your pan tends to sick, I would recommend using 1 Tbsp of the olive oil, but if you have non-stick cookware, you can skip the added fat. Set chicken aside to cool.
  2. In same pan, heat 1 Tbsp olive oil, and sauté onions, celery, and garlic over medium heat for about 5 minutes. Turn heat down to low-medium, and stir in salsa. Add in cream cheese, and stir until melted into salsa and vegetable mixture.
  3. Meanwhile, chop chicken into small pieces. Add chicken to now melted cream cheese mixture. Once combined, add in Frank’s Red Hot and ranch dressing. This is where you need to taste, and adjust heat to your liking. I add about 6 to 8 drops of Tabasco, but you might find you don’t like any or want more.
  4. Transfer mixture to casserole or oven proof serving dish. Top with cheese, but do not mix in.
  5. Bake at 350 for 20 minutes, or until bubbly. Let rest for about 10 minutes, and then stir in shredded cheeses. Add in desired amount of blue cheese, and stir once more.
  6. Serve hot with your choice of dippers.

Jalapeño Popper Dip

I’ve seen a lot of recipes for this dip, so when Jim needed something for this Sunday’s Packers game, I knew it was my opportunity to give it a try. We were in the car, so I Google, and came upon this recipe. It seemed like a good place to start, but I made a few changes, that are reflected below. I wanted a more “authentic” popper taste, so I opted for fresh jalapeños rather than pickled. I also decided to take advantage of the fresh thick cut bacon I had on hand, so I sautéed the peppers in some bacon pieces and drippings before adding to the rest of the ingredients. The result was a dip with great flavor and a bite without being overly spicy.

Update: Find yourself with some leftover dip? Try this Tortilla Crusted Jalapeno Popper Stuffed Chicken Breast, you won’t be disappointed.


Ingredients:

Dip:

  • 3 slices bacon, diced
  • 3 to 4 jalapeños, coarsely chopped
  • 2 8 oz. packages cream cheese, room temp
  • ½ cup mayonnaise
  • 1 cup shredded Mexican blend cheese
  • 2 4 oz. can chopped green chilies
  • 1 clove garlic, peeled


Topping:

  • 1 cup panko bread crumbs
  • ½ cup Parmesan cheese
  • ½ cup shredded Mexican blend cheese
  • ½ stick butter, melted


Directions:

  1. Sauté bacon over medium heat until starting to brown, about 8 minutes. Stir in chopped jalapeños, and continue to sauté until bacon is fully cooked, being careful not to burn, about 10 minutes more. Set aside to cool.
  2. In a food processor add the rest of the dip ingredients and process until smooth. Add in the bacon and jalapeños and pulse until incorporated, but not completely smooth. You want to be left with little bits of bacon and jalapeño.
  3. Spread the dip into a greased 2 quart casserole.
  4. In a bowl mix panko and the cheese. Pour melted butter over top crumb mixture and mix well. Sprinkle crumb mixture evenly over the dip and bake in a 375° oven for about 20 minutes. You want the top to get browned and the dip to be heated through and bubble gently on the edges.
  5. Serve hot with thick tortilla chips and veggies.

Delafield Brewhaus’s Asiago Artichoke Dip

While in college, during summers and holidays, I worked at a local brewpub called The Delafield Brewhaus. They make the best dip of its kind I have EVER had. I never got tired of it, and still order it every time we stop in. Not only do they serve it as an appetizer, but they also use it as the base sauce for a steak pizza. Make sure you have a good quality fresh loaf of bread to go with this super yummy dip.


Note: Chipotle peppers in adobo are available at most grocery stores in the Latin or Mexican foods section. When adding, start a 1/2 pepper at a time, as they are very hot, and a little will go a long way.

Ingredients:

  • 1 pound cream cheese, room temperature
  • 1/3 cup shredded Asiago cheese
  • 1/3 cup shredded Parmesan cheese
  • 1 teaspoon minced fresh garlic
  • ¼ teaspoon dried thyme
  • 1 cup chopped artichoke hearts, drained (not marinated)
  • 1/3 cup mayonnaise
  • Chipotle peppers in Adobo sauce
  • Ciabatta bread


Directions:

  1. Mix all ingredients together in a large bowl until combined. This could be done with a food processor or an electric or stand mixer if desired, especially if doing a double batch.
  2. Spread mixture in ungreased 10-inch pie tin or casserole dish. Cover and refrigerate 30 minutes or overnight.
  3. Preheat oven to 400. Bake dip, uncovered, 10 to 15 minutes or until browned and bubbly.
  4. Serve immediately with warmed ciabatta bread. Makes 8 appetizer servings.

Note: This dip freezes beautifully, so I often double the recipe and freeze half prior to baking for a quick thaw and bake later.